ODeV framework meets TouchGFX
TouchGFX is a powerful graphics UI tool (C++ framework and an UI designer software) to create amazing user interface for embedded application. Computer graphics and User Interface are one of my passion, so let’s integrate TouchGFX within the ODeV framework.
I am working on it in a dedicated branch (gui_demo) of the GIT repository. It is still a work in progress, but the firmware is already running on the board in all configurations (Debug, Release, TEST_R, Trace). Let’s take a sneak peek at this demo…
Main components
The idea
Working at this demo I have three goals in my mind:
I choose that evaluation board because it is powered by STM32L4+ and it is supported by TouchGFX. Moreover it comes with two displays. At the end, if this demo works fine, we will be able to use all templates provided by TouchGFX with ODeV and we will have a powerful environment to develop embedded application with amazing GUI.
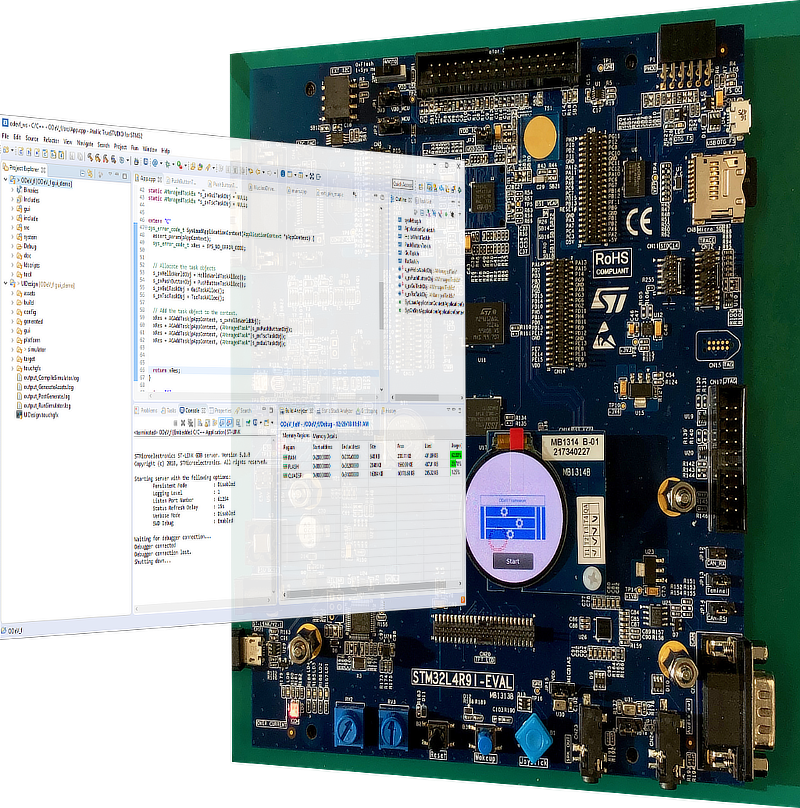
Fig.01
How to use TouchGFX Designer generated code with the IDE and the standard ODeV project
I created a template project with the Designer and I called it UIDesign. A good thing about the Designer is that it creates a self contained project inside the root folder. All files are there, resources like images and fonts, the project specific files for the supported IDE (IAR and Keil), the board support packages provided by ST, etc. For convenience I create the UIDesign project in the same workspace as the ODeV_f project. At this point what I need to do is basically:
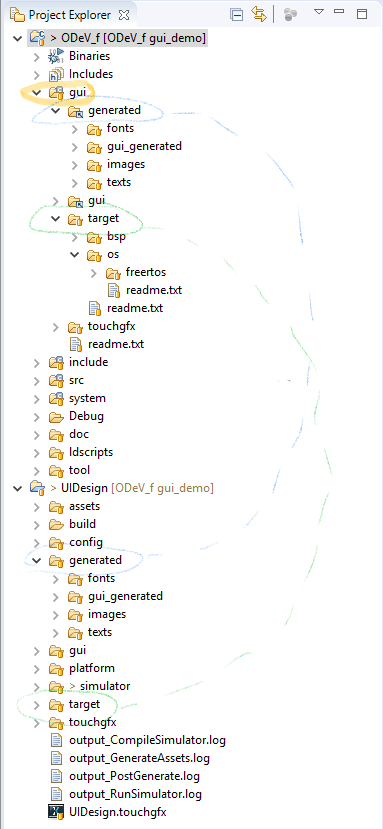
Fig.02
Fig.02 displays the two projects and their folder structure. Note that all UIDesign files are imported inside the gui folder as linked resources. In this way every time we modify the UI in the Designer, all generated or modified files are automatically available in the ODeV_f project.
How to integrate the GUI task with ODeV
TouchGFX is a well designed object oriented and multi tasking framework. It provides two tasks, a GUI task and a Touch Screen Controller Task, and it uses FreeRTOS. This suggest that we should be able to transform the two tasks in Managed Task. So I created two managed tasks:
How to program and debug the evaluation board
Even if TrueSTUDIO version v9.2.0 uses STM32CubeProgrammer to program the target, and so it supports the external memory of the ST evaluation board, I had a problem to program the board. But I was able to program the board using STM32CubeProgrammer as a standalone tool. So, waiting for ST to fix this issue, we can use some feature of Eclipse to bypass the problem. I created a launch group with two launch configurations. The first one use STM32CubeProgrammer as external tool to program the board, and the second one start a debug session without download the firmware.
Use the Debug Configurations menu command from the Run menu to open the Debug Configuration dialog. In this dialog there is ODeV_f Program and Debug launch group (see Fig.03). Use it to program the board and start a debug session. You can give a look at each launch configuration in order to find out how it works.
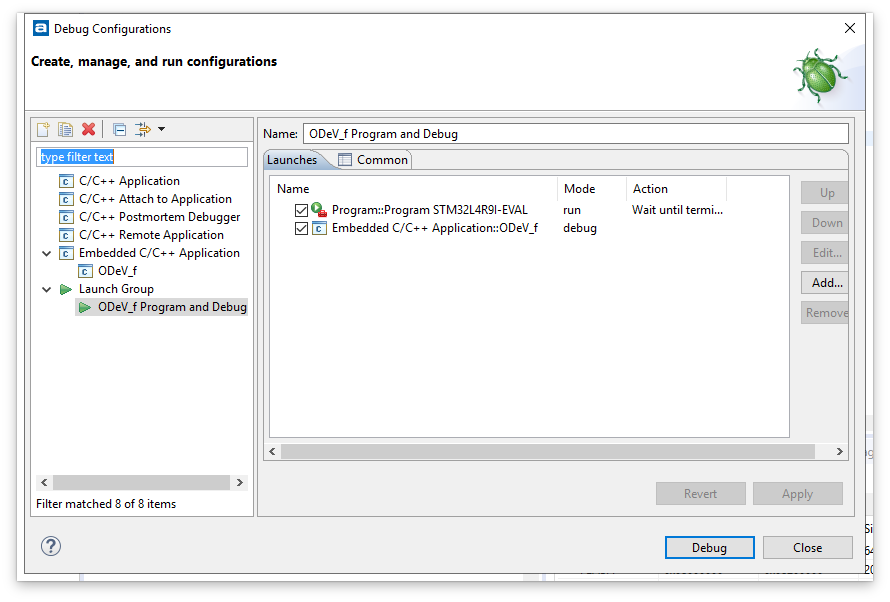
Fig.03
Conclusions
This demo is still a work in progress: there is still some work to do in order to better integrate the TouchGFX project with ODeV. But the demo is already working well enough.
You can download this project from the download page of this web side, or from the GIT repository.
The video at the beginnong of the page displays all the concepts discussed in this post.
December 2018